Pages

6/28/10

The Aftermath

I promised to share all of the nitty, gritty details of my projects even if they aren't very pleasant. This is the downside of being a furniture transformer / DIYer. The thing is, when you're getting all crafty and handy, you have to have a place to do all of your amazing work, right?

Unfortunately, at our house, the garage is the victim of choice.

I used to like to park my rockin' mini-van *sarcasm* in there, but that's not exactly an option anymore. Not with half the garage filled with old furniture and the other half my kids junk stuff.

Thankfully, my sweet hubby has been pretty understanding and patient with me. See, the garage is usually his domain. He's the one who usually spends time working out there, and he's the one who gets to clean it up --- I've got enough work to do inside, thank you very much.

So when he learned of my new hobby and discovered that his garage would soon be taken over by me, he was surprisingly okay with it --- at least I think so.

When he saw the mess I made,however --- um, he may have lost a little bit of that patience. ;)

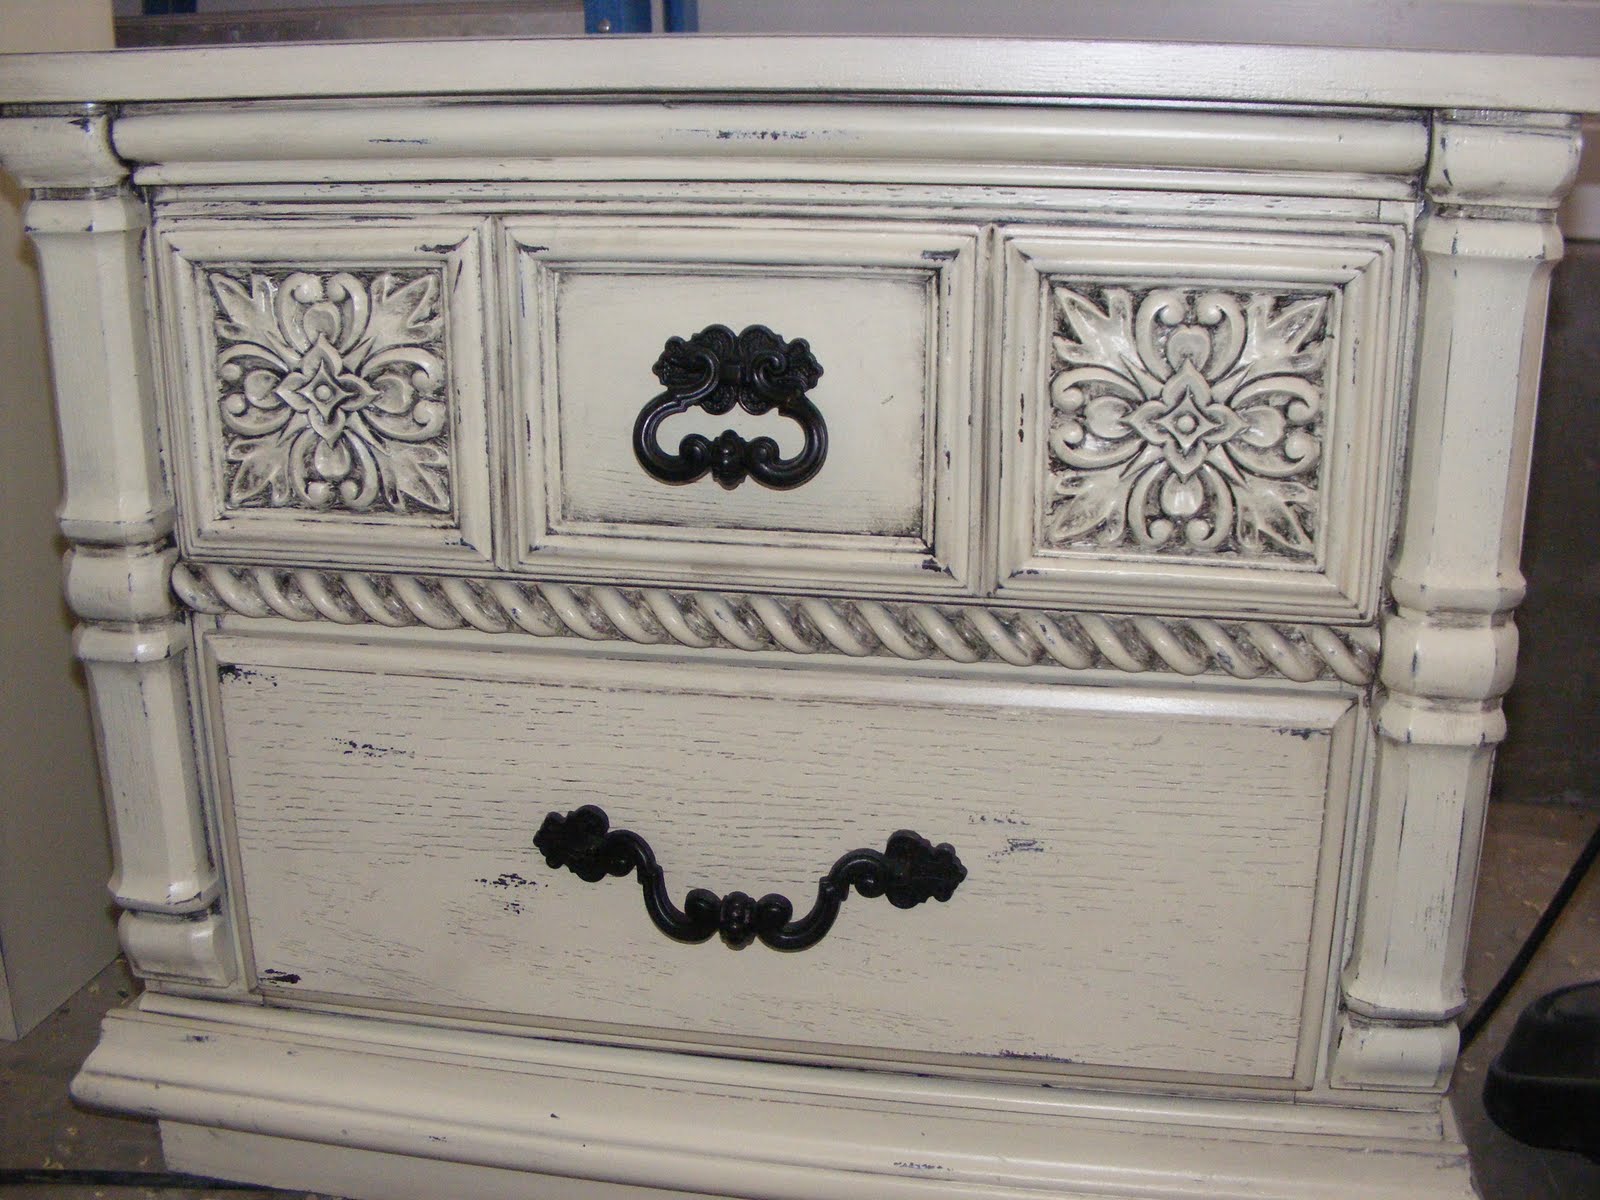
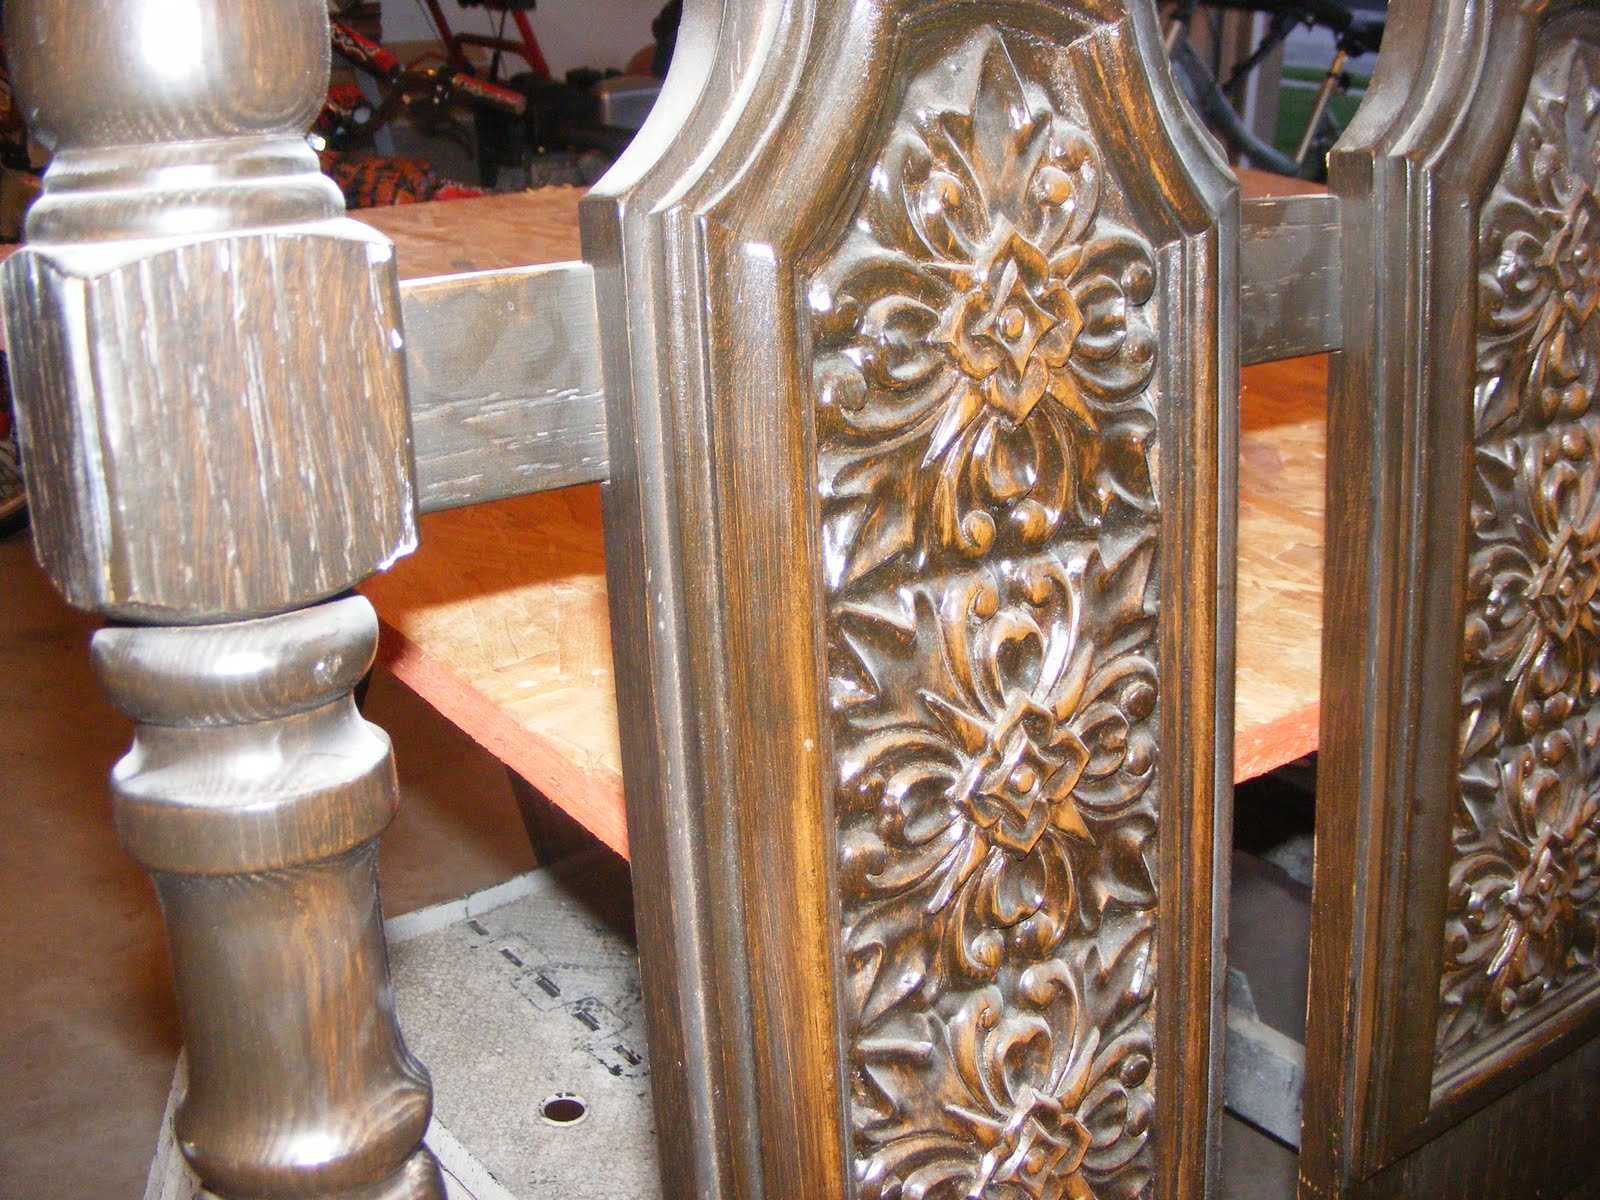
Here is a picture of the aftermath of my first project --- I should have taken "before" and "after" photos of the garage too! The after picture isn't so wonderful this time. This is actually after I'd already cleaned up a little bit --- it really was a BIG MESS! I'm going to have to try not to be such a slob next time, but hey, I was working hard, what can I say!

Now that the mess has been cleaned up, I'll be starting on some new projects. :)

I've got some great stuff to work on this week, I can't wait to share it with you!

Thanks for reading --- feel free to comment --- and have a FABULOUS day!


6/26/10

Now that's what I call thrifty!

This morning I had a fabulous grocery shopping trip. It's days like today that make spending time cutting out all of those little coupons actually worth the effort!

This week Smith's is "doubling" coupons, well that's what they call it anyway, but really they are taking any coupon that has a value less than $1 and turning into $1. So, a .50 coupon becomes $1, a .25 coupon becomes $1, you get the point.

It's been a while since there's been a promo like this, so I was SUPER excited! I got nearly everything on my list, and felt only a little bit silly pushing two full shopping carts up to the register. Here's my haul:

The picture doesn't quite give the full effect, but let's just say it's a lotta stuff! Just in case you're extremely bored right now, I'll even give you a little list:
22 boxes GM cereal
15 Grands Biscuits
5 1 lb. packages string cheese
2 country crock butter tubs
10 hunts ketcup
5 bags wacky mac pasta
5 small Dawn Dish Soaps
1 dial hand soap (free)
2 Breyers Ice Cream
10 Totinos Party Pizzas
5 Totinos pizza rolls (free)
2 boxes smart taste pasta (free)
5 betty crocker cookie mixes
5 boxes banquet brown & serve sausage
1 pack Huggies diapers 36 ct.

So what's your guess??? How much do you think I paid for this pantry full of groceries?
$150?? $110?? Nope. Not even close. My total was $85.00 minus $3.00 that the manager just let me keep because she couldn't get her computer to take it off.

To top it off, I found a $25 Smith's gift card in my wallet --- from who knows when --- that I used. So I paid a GRAND TOTAL of $57 Bucks!!!
Woooot Woooot!

Of course my kids were excited about all of the groceries too.......but not for the same reason I was.

Grocery castles???

What can I say, I have creative children!


I get all of my couponing information from an amazingly wonderful website called www.pinchingyourpennies.com

It's where I learned all of the tricks of the trade --- so if you want to become a couponing queen too, check it out!

Feel free to ask me any questions as well. I'd love to hear your comments!

Thanks for reading ---- have a fabulous day!!!

6/25/10

The Transformation of Junk

I've been a very busy girl for the last two weeks. It started when my sweetheart of a Sister-in-law, Jamila, told me I just had to check out this awesome blog about decorating called All Things Thrifty. When I finally found some spare time to sit down and look at it (spare time? what's that?) I was hooked! I love the shabby chic style that she uses, and it's all so simple to do --- I kept thinking, "hey, I could do that."

So the next morning I got up extra early so I could make it to the D.I. right when the
y opened their doors.

Um, did I just say that?

Yes. I. Did. There's no shame in being a D.I. lover --- just ask my sister Heidi --- she has been a shameless D.I. addict for quite a few years now (although, the other day when a lady asked where she got her cute capris, Heidi was too embarrassed to admit forgot she'd bought them at the D.I. hmmm).

I will admit that I have now gotten up early not once, but twice, in order to
get first dibs at the DI --- that place may very well become my new favorite place to shop :)

Imagine my delight when I found these three beauties!


Now, I know you're probably thinking "UUUGGGHHHH!" They're hideous, right?

But I knew they had great hidden potential, and I was really excited to try out the glazing techniques that I had read about. So I brought the bad boys home and gave them a major facelift!

I started by giving them a good cleaning --- which is the worst part in my opinion --- I hate cleaning up other people's stuff! Yes, I do it every day (kids, kids friends, hubby) but to clean up after a total stranger --- to actually have to wipe mysterious hairs out of drawers, can you say
EEEEWWWWWW! seriously.

But once you've got them all spic and span, that's when the fun starts. The first thing I did was give them a good coat of primer. I've learned from my own experience and from the advice of Brooke at A.T.T. that starting with a good quality primer is a must. I've painted other large projects before without priming first, and it takes twice as long because you have to do twice as many coats of paint. Save yourself a headache and prime first.

Next, I spray painted them. Whooo Hoooo for spray paint! I can't believe it's actually taken me this many years to figure out how much easier it is to use a spray can instead of a dang paint brush.

A couple of years ago, I painted this e
ntire thing using a four inch foam brush....it took for-e-ver!


It does cost a little more to buy spray paint than it would just to buy a can of paint, but it's soooo much faster, and we all know that "time is money" right? Right.

After painting, I put on a thin coat of glaze, this time using a paintbrush. On my first attempt, I used a brown tinted glaze. I had the hutch completely finished when I started thinking I wasn't loving it.

I don't know what it was, maybe the brown on white just made it look dirty or something, but I played around a little bit with different colors and decided that I liked the look of the black glaze better.

Sooooo, I started over.

And although I'm sure my glazing technique will improve after practice, I have to say that I really do l.o.v.e. the finished look. A little shabby with a little chic --- perfect!

The furniture cost me a total of $32, and I probably spent about $40 on the primer, paint, glaze and polyurethane. And I spent about 5 hours working on them (including my re-do).

Here are the before and after pictures side by side:


Pretty amazing what a little paint can do isn't it. I'm sorta proud of myself. *patting self on the back* :)

Let me know what you think.


6/24/10

My New Blog

After being inspired by some super cute and fabulous blogs all about decorating on a budget, I've decided to join in the fun and create my own *awesome* blog about decorating deals! Does this mean I think I'm some sort of expert on the subject?

Um, no.

But I do really enjoy decorating, and I've actually discovered that I like to "save" old furniture by refinishing it (paint can do amazing things).

If you're like me, you've thought to yourself more than once, "I could be a fabulous decorator, and my house would look amazing if only I had the money." *sob, sigh*

Well my friends, that is exactly why I'm starting this blog, to get myself off my rear and get some things done around my house to help give you some easy, practical and most importantly thrifty, frugal, cheap ideas for sprucing up that wonderful place you like to call home.

Now, here's a little disclaimer for those of you who follow my "family" blog....

um, I know you are laughing hysterically at the thought of me being able to keep a blog updated regularly --- ha, ha!! I admit that I've been somewhat of a major slacker in that department, Buuutttt, I'm going to do much, much better from now on. *crossing fingers*

The idea of doing this blog --- and becoming a decorating-on-a-dime diva --- has me super duper excited!!

I plan to be constantly creating, and sharing all the nitty gritty details along the way --- the good, the bad and the ugly!

I hope to turn my pretty-cute-but-could-use-some-help house into a fabulously beautiful home, one room at a time, and I hope to be able to inspire you just a little during the journey, I hope you'll join me!!!